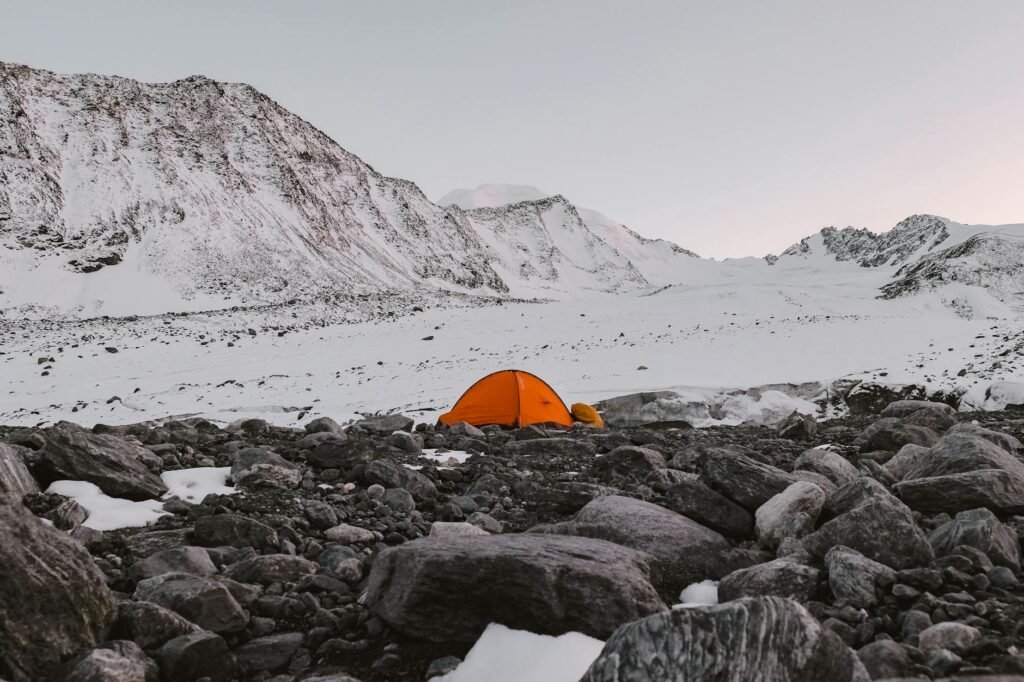
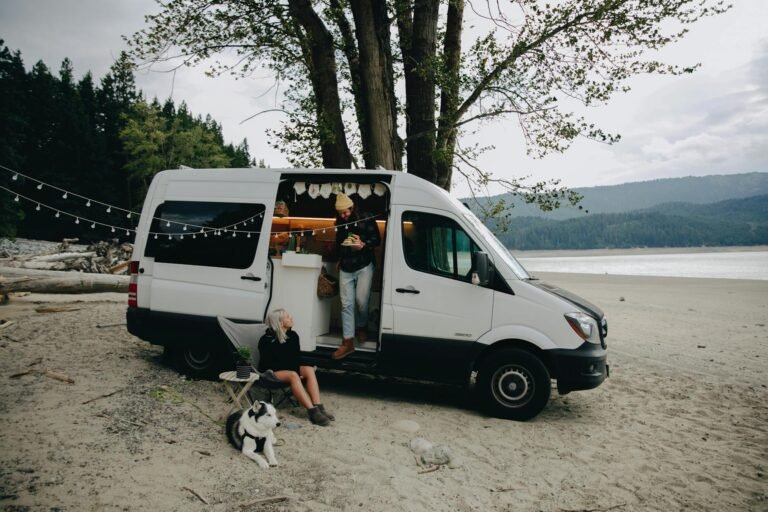
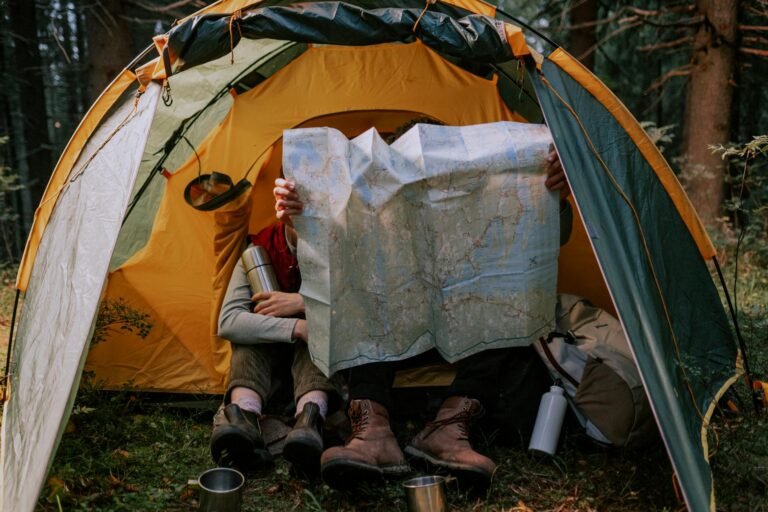
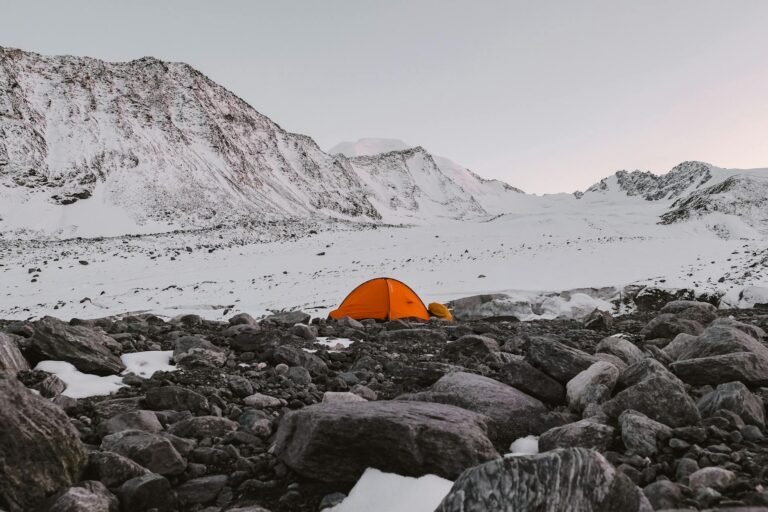
❄️ Are you dreaming of a winter wonderland camping adventure, but unsure about what to pack? Don’t let the fear of freezing temperatures and unpredictable weather dampen your spirits! With the right gear, winter camping can be an exhilarating and unforgettable experience.
Imagine yourself nestled in a cozy sleeping bag, sipping hot cocoa under a starry sky, surrounded by pristine snow-covered landscapes. 🏕️ Sounds magical, right? But to turn this dream into reality, you need to be prepared. That’s why we’ve compiled a list of 10 must-have items for your winter camping trip. From essential cold-weather clothing to entertainment options for those long winter nights, we’ve got you covered.
In this blog post, we’ll walk you through everything you need to ensure a safe, comfortable, and enjoyable winter camping experience. So grab a warm drink, settle in, and let’s explore the gear that will make your frosty outdoor adventure a success!
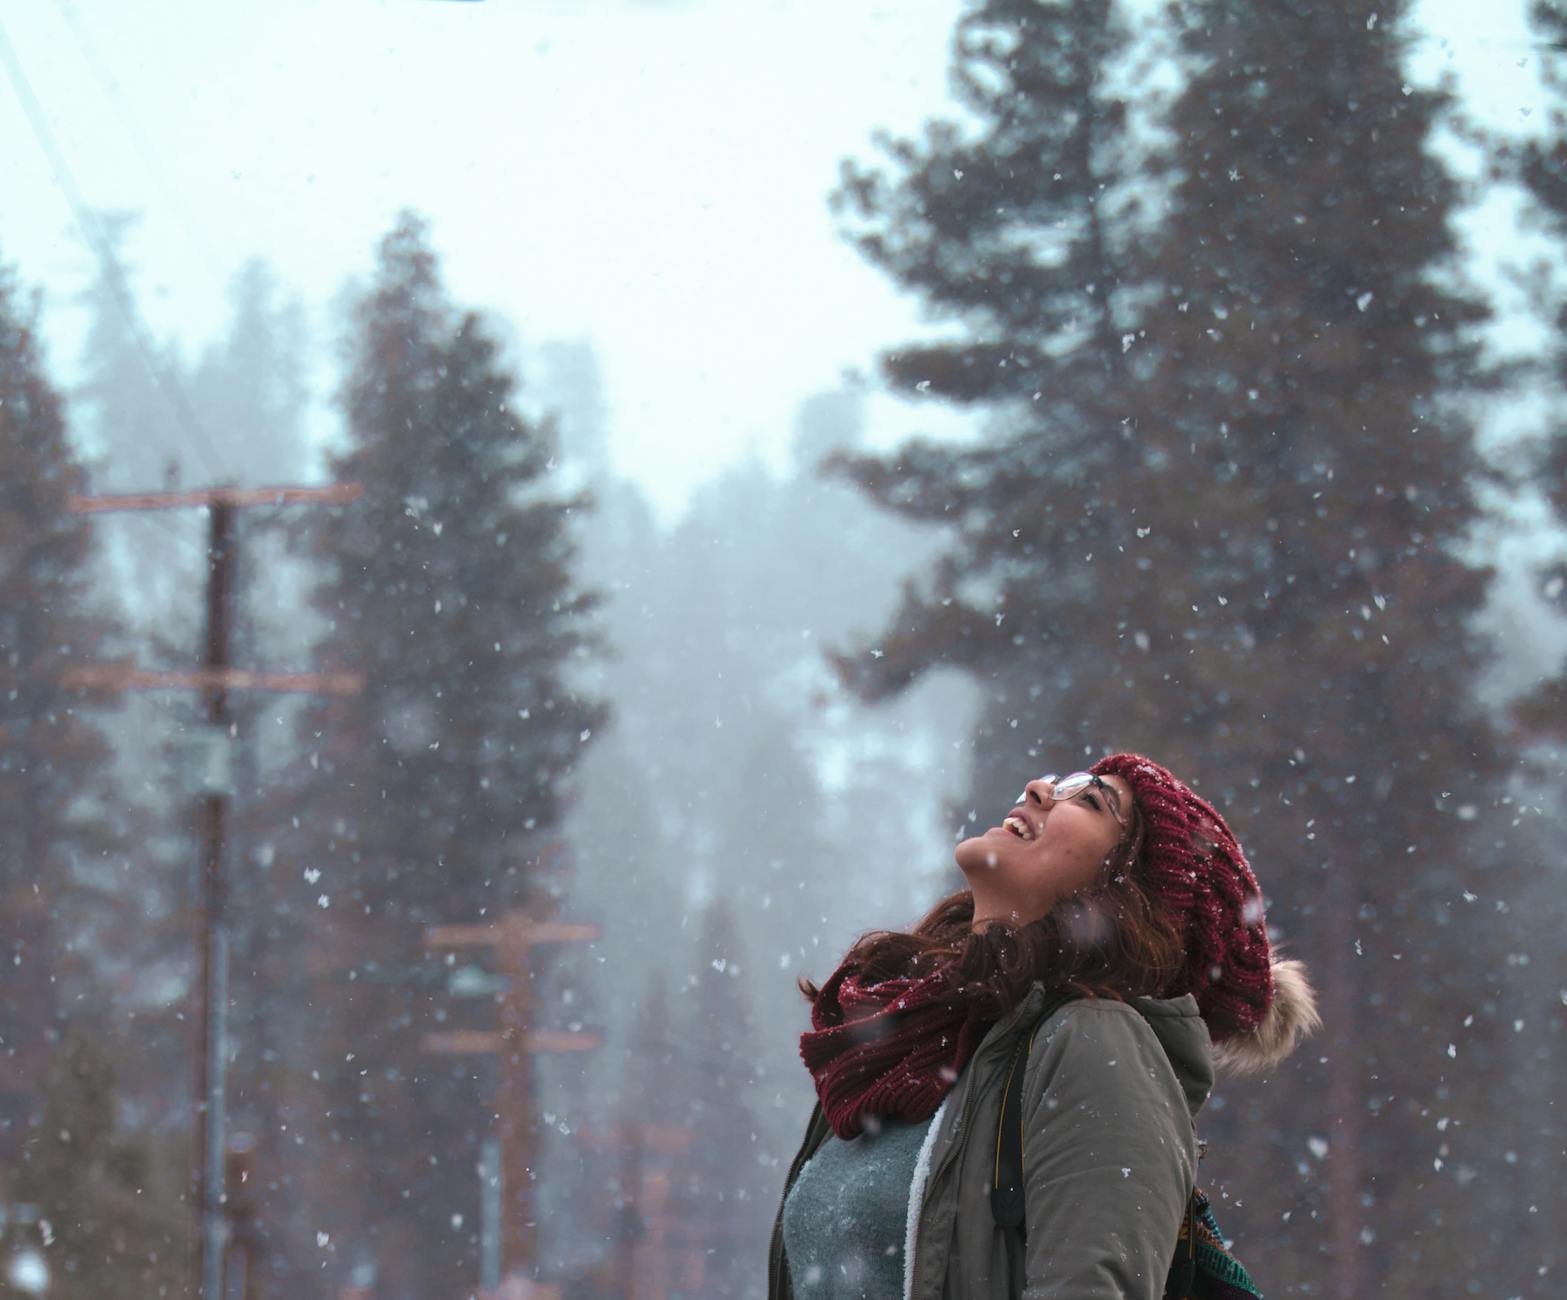
Essential Cold-Weather Clothing
When embarking on a winter camping adventure, your choice of clothing can make or break your experience. Proper cold-weather attire is not just about comfort; it’s a crucial aspect of safety and survival in harsh winter conditions. Let’s delve into the essential cold-weather clothing items that should be at the top of your winter camping checklist.
A. Insulated Jackets for Maximum Warmth
The cornerstone of any winter camping wardrobe is a high-quality insulated jacket. These jackets are designed to trap body heat and provide a barrier against the cold, making them indispensable for outdoor winter activities.
Types of Insulation
-
Down Insulation:
- Excellent warmth-to-weight ratio
- Highly compressible
- Performs best in dry conditions
-
Synthetic Insulation:
- Retains insulating properties when wet
- Dries faster than down
- More affordable option
When choosing an insulated jacket, consider factors such as:
- Temperature rating
- Wind resistance
- Water repellency
- Breathability
| Feature | Down Insulation | Synthetic Insulation |
|---|---|---|
| Warmth-to-Weight | Excellent | Good |
| Compressibility | High | Moderate |
| Performance When Wet | Poor | Good |
| Drying Time | Slow | Fast |
| Cost | Higher | Lower |
Remember, layering is key in cold weather. An insulated jacket should fit comfortably over your base and mid-layers while allowing freedom of movement.
B. Moisture-Wicking Base Layers
The foundation of your winter camping clothing system is the base layer. These garments sit directly against your skin and play a crucial role in regulating body temperature and managing moisture.
Key features of effective base layers include:
- Moisture-wicking properties to move sweat away from the skin
- Quick-drying fabrics to prevent chilling
- Snug fit to maximize insulation and wicking efficiency
Popular materials for base layers include:
-
Merino Wool:
- Excellent temperature regulation
- Natural odor resistance
- Soft and comfortable against the skin
-
Synthetic Fabrics (e.g., polyester, nylon blends):
- Highly durable
- Fast-drying
- Often more affordable than wool
When selecting base layers, opt for long-sleeved tops and full-length bottoms to provide complete coverage. It’s advisable to pack multiple sets to change into dry layers as needed, especially during multi-day trips.
C. Waterproof Outer Shells
While insulated jackets provide warmth, a waterproof outer shell is essential for protection against wind, rain, and snow. This crucial layer keeps you dry and shields you from the elements, which is vital for maintaining body heat in cold conditions.
Key features to look for in a waterproof shell include:
- Waterproof and breathable membrane (e.g., Gore-Tex, eVent)
- Sealed seams to prevent water ingress
- Adjustable hood, cuffs, and hem for a customized fit
- Ventilation options like pit zips for temperature regulation
When choosing a waterproof shell, consider:
-
Activity Level:
- High-intensity activities require more breathable fabrics
- Lower activity levels may prioritize durability and insulation
-
Weather Conditions:
- Harsh conditions necessitate more robust, fully-featured shells
- Milder winters might allow for lighter, more packable options
-
Compatibility with Layers:
- Ensure the shell is large enough to fit comfortably over your insulating layers
- Look for features that work well with gloves and other winter gear
Remember, a good waterproof shell is not just for rainy or snowy days. It also serves as an excellent wind barrier, which is crucial for preventing heat loss in cold environments.
D. Thermal Socks and Winter Boots
Proper foot care is paramount in winter camping. Cold, wet feet can quickly lead to discomfort and even dangerous conditions like frostbite. Investing in high-quality thermal socks and winter boots is essential for a safe and enjoyable winter camping experience.
Thermal Socks
Effective winter socks should:
- Provide insulation to keep feet warm
- Wick moisture away from the skin
- Offer cushioning for comfort during long hikes
Consider these options:
-
Wool Blend Socks:
- Excellent insulation even when damp
- Natural odor resistance
- Durable and long-lasting
-
Synthetic Blend Socks:
- Quick-drying properties
- Good moisture management
- Often more affordable than wool options
Pro Tip: Pack multiple pairs of socks and change them regularly to keep feet dry and warm.
Winter Boots
Choosing the right winter boots is crucial for comfort and safety. Look for these features:
- Waterproof construction to keep feet dry
- Insulation rated for low temperatures
- Sturdy, non-slip soles for traction on snow and ice
- Sufficient height to prevent snow entry
- Compatibility with snowshoes or crampons if needed
When selecting winter boots, consider:
-
Fit:
- Allow space for thick socks without constricting circulation
- Ensure a snug fit around the heel to prevent blisters
-
Insulation Type:
- Synthetic insulation (e.g., Thinsulate) for wet conditions
- Down insulation for extremely cold, dry environments
-
Activity Level:
- Lightweight boots for active winter hiking
- Heavier, more insulated boots for stationary activities
Remember, properly fitted boots are essential. Too tight, and they can restrict circulation, leading to cold feet. Too loose, and they can cause blisters and reduce insulation effectiveness.
With these essential cold-weather clothing items in your winter camping gear, you’ll be well-prepared to face the challenges of outdoor winter adventures. Proper layering, moisture management, and protection from the elements are key to staying comfortable and safe in cold conditions. As we move forward, we’ll explore another crucial aspect of winter camping: the sleep system that ensures cozy nights even in the coldest environments.

Sleep System for Cozy Nights
Now that we’ve covered essential cold-weather clothing, let’s dive into creating a comfortable sleep system for your winter camping adventure. A good night’s rest is crucial for enjoying your outdoor experience, especially in harsh winter conditions. We’ll explore the three key components of a cozy winter sleep system: a four-season tent, a winter-rated sleeping bag, and an insulated sleeping pad.
A. Four-season tent for wind and snow protection
When it comes to winter camping, your tent is your first line of defense against the elements. A four-season tent is specifically designed to withstand harsh winter conditions, including strong winds and heavy snow loads.
Key features of a four-season tent:
- Sturdy construction
- Reinforced poles
- Steep walls to shed snow
- Multiple guy-out points for stability
- Vestibules for gear storage
A high-quality four-season tent will typically have a dome or geodesic design, which provides excellent stability in high winds. The fabric used in these tents is usually more robust and has a higher denier count compared to three-season tents, offering better insulation and durability.
When selecting a four-season tent, consider the following factors:
| Factor | Importance | Considerations |
|---|---|---|
| Capacity | High | Choose a tent with extra space for gear storage |
| Weight | Medium | Balance between durability and portability |
| Ventilation | High | Prevents condensation build-up |
| Setup ease | Medium | Important in harsh weather conditions |
| Price | Varies | Invest in quality for safety and comfort |
Remember, while a four-season tent is heavier than its three-season counterpart, the extra weight is well worth the protection and peace of mind it provides during winter camping trips.
B. Winter-rated sleeping bag
After securing a reliable shelter, the next crucial component of your winter sleep system is a properly rated sleeping bag. Winter-rated sleeping bags are designed to keep you warm in extremely cold temperatures, often rated for use in sub-zero conditions.
Choosing the right winter sleeping bag:
- Temperature rating: Look for bags rated at least 10°F lower than the lowest temperature you expect to encounter.
- Insulation type: Down vs. synthetic fill (each has pros and cons).
- Shape: Mummy-style bags are most efficient for heat retention.
- Draft collars and hoods: These features help prevent heat loss.
- Zipper quality: Ensure it’s robust and has an anti-snag design.
Let’s compare down and synthetic insulation to help you make an informed decision:
| Aspect | Down Insulation | Synthetic Insulation |
|---|---|---|
| Warmth-to-weight ratio | Excellent | Good |
| Compressibility | Very high | Moderate |
| Performance when wet | Poor | Good |
| Drying time | Slow | Fast |
| Durability | Moderate | High |
| Cost | Higher | Lower |
While down sleeping bags offer superior warmth-to-weight ratio and compressibility, synthetic bags perform better in damp conditions. Consider your specific needs and the typical conditions you’ll face when making your choice.
Pro tip: To maximize the effectiveness of your sleeping bag, wear clean, dry base layers to bed and consider using a sleeping bag liner for added warmth and cleanliness.
C. Insulated sleeping pad
The final piece of the winter sleep system puzzle is an insulated sleeping pad. Many campers underestimate the importance of a good sleeping pad in cold weather, but it’s crucial for insulating you from the frozen ground.
Why an insulated sleeping pad is essential:
- Prevents heat loss to the ground
- Provides cushioning for comfort
- Adds an extra layer of insulation
- Protects your sleeping bag from moisture
When selecting an insulated sleeping pad for winter camping, pay attention to the R-value, which measures the pad’s ability to resist heat flow. For winter camping, look for pads with an R-value of 5 or higher.
Types of insulated sleeping pads:
- Air pads: Lightweight and comfortable, but can be punctured
- Self-inflating pads: Blend of open-cell foam and air, good balance of comfort and insulation
- Closed-cell foam pads: Durable and affordable, but bulky
Consider using a combination of pads for maximum insulation. For example, placing a closed-cell foam pad beneath an air pad or self-inflating pad can significantly boost your overall R-value.
Here’s a comparison of different pad types for winter camping:
| Pad Type | R-Value Range | Weight | Packed Size | Comfort | Durability |
|---|---|---|---|---|---|
| Air Pad | 1-7 | Light | Small | Excellent | Fair |
| Self-Inflating | 3-6 | Medium | Medium | Good | Good |
| Closed-Cell Foam | 1-2 | Light | Large | Fair | Excellent |
Remember, the key to a warm and comfortable night’s sleep in winter conditions is layering your sleep system effectively. Start with a high R-value sleeping pad, add your winter-rated sleeping bag, and consider additional layers like a sleeping bag liner or a quilt for extra warmth on particularly cold nights.
By carefully selecting and properly using these three components – a four-season tent, a winter-rated sleeping bag, and an insulated sleeping pad – you’ll create a cozy sleep system that will keep you warm and comfortable throughout your winter camping adventure. This solid foundation will ensure you wake up refreshed and ready to tackle the day’s activities, whether that’s hitting the snowy trails or simply enjoying the serene winter landscape.
With your sleep system sorted, it’s time to consider how you’ll stay warm and nourished during your waking hours. Next, we’ll explore the essential heating and cooking equipment you’ll need for your winter camping trip.
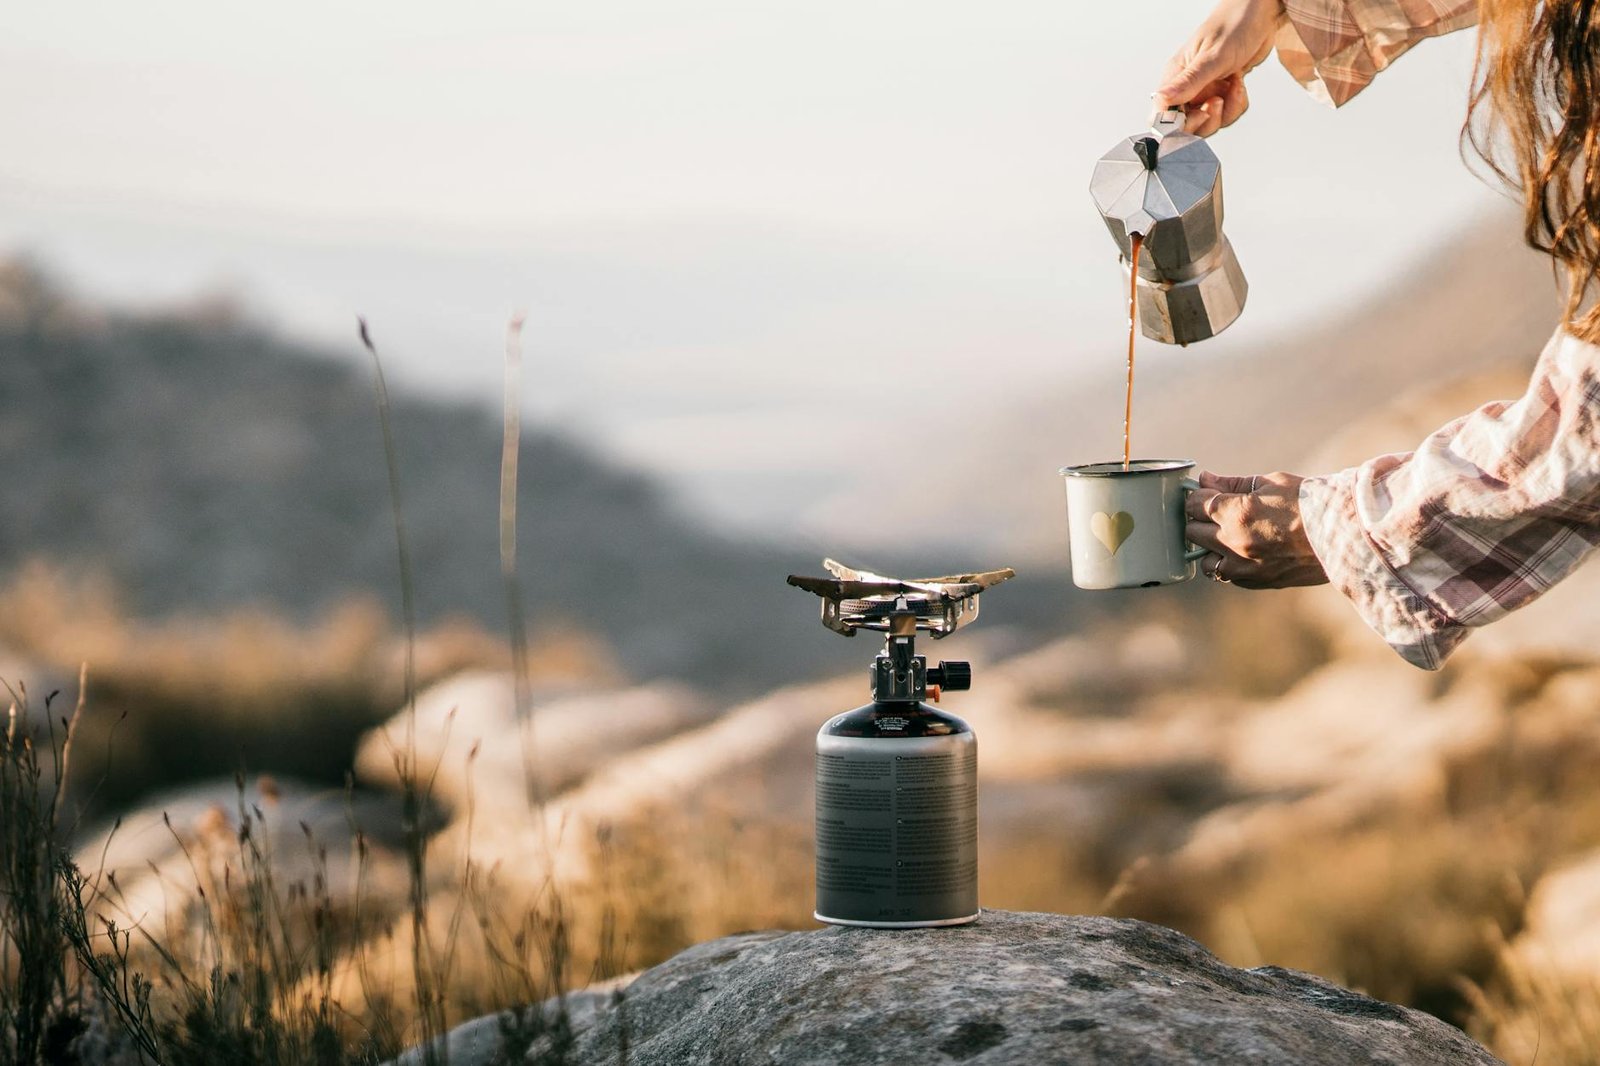
Heating and Cooking Equipment
Now that we’ve covered essential cold-weather clothing and sleep systems, let’s dive into the crucial world of heating and cooking equipment for your winter camping adventure. Proper gear in this category can make the difference between a miserable, cold experience and a cozy, enjoyable outing in the snow.
A. Portable camp stove designed for winter use
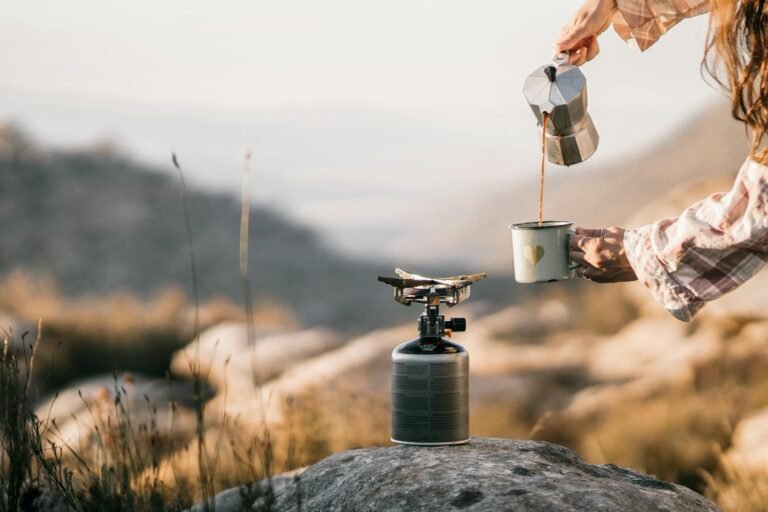
When it comes to winter camping, not all camp stoves are created equal. You need a stove specifically designed to perform in cold temperatures and potentially harsh conditions. Here are some key features to look for in a winter-ready portable camp stove:
- Wind resistance: Look for stoves with built-in windscreens or the ability to attach them.
- Stable base: A wide, sturdy base helps prevent tipping on uneven snow or ice.
- Pressure regulation: This feature ensures consistent fuel flow in cold temperatures.
- Multi-fuel capability: Some stoves can use different fuel types, offering versatility in various conditions.
| Stove Feature | Importance | Explanation |
|---|---|---|
| Wind resistance | High | Protects flame from gusty conditions, improving efficiency |
| Stable base | Medium | Prevents accidents and spills on uneven terrain |
| Pressure regulation | High | Maintains consistent performance in cold weather |
| Multi-fuel capability | Medium | Provides options if one fuel type is unavailable |
Some top-rated portable camp stoves for winter use include the MSR WhisperLite Universal, Jetboil MiniMo, and the Primus OmniLite Ti. These stoves have proven track records in cold weather and are favored by experienced winter campers.
B. Fuel canisters suitable for cold temperatures
Choosing the right fuel for your winter camping trip is just as important as selecting the proper stove. Cold temperatures can significantly affect fuel performance, so it’s crucial to use fuel canisters designed for winter use. Here are some considerations:
- Isobutane-propane mix: This blend performs better in cold weather than pure butane.
- Four-season fuel canisters: Some brands offer specially formulated fuel for winter use.
- Liquid fuel: White gas or kerosene can be more reliable in extremely cold conditions.
To maximize fuel efficiency and performance:
- Keep fuel canisters warm by storing them in your sleeping bag at night.
- Use a pot cozy to retain heat and reduce fuel consumption during cooking.
- Consider using a heat exchanger system to improve efficiency in cold conditions.
C. Insulated water bottles and thermoses
Staying hydrated is crucial during winter camping, but preventing your water from freezing can be a challenge. Insulated water bottles and thermoses are essential for keeping your liquids in a drinkable state. Look for these features:
- Double-wall vacuum insulation: This technology provides superior temperature retention.
- Wide mouth openings: These are less likely to freeze and easier to fill with snow for melting.
- Durable construction: Look for bottles that can withstand freezing temperatures without cracking.
Some popular insulated bottle options for winter camping include:
- Hydro Flask Wide Mouth
- Yeti Rambler
- Klean Kanteen TKPro
Pro tip: Fill your insulated bottles with hot water before bed and place them in your sleeping bag. This will help keep you warm throughout the night and provide unfrozen water in the morning.
D. Heat-retaining cookware
Efficient cookware is essential for conserving fuel and ensuring your meals stay hot in cold environments. When selecting cookware for winter camping, consider the following:
- Material: Aluminum conducts heat quickly but doesn’t retain it well. Stainless steel is more durable and retains heat better.
- Insulation: Some cookware comes with built-in insulation or neoprene sleeves.
- Nesting design: Look for sets that nest together to save space in your pack.
Heat-retaining features to look for:
- Double-wall construction
- Lids with steam vents
- Integrated cozies or sleeves
| Cookware Feature | Benefit |
|---|---|
| Double-wall construction | Improves heat retention and reduces heat loss |
| Lids with steam vents | Allows for pressure release while retaining heat |
| Integrated cozies/sleeves | Provides additional insulation for longer heat retention |
Some recommended cookware sets for winter camping include the GSI Outdoors Glacier Stainless Cookset and the MSR Alpine 2 Pot Set.
To further improve heat retention and fuel efficiency, consider these tips:
- Pre-heat your cookware with a small amount of hot water before adding food.
- Use a windscreen around your cooking area to minimize heat loss.
- Opt for quick-cooking meals that require less fuel and time to prepare.
When it comes to winter camping, having the right heating and cooking equipment can significantly enhance your experience. A reliable stove, appropriate fuel, insulated water bottles, and heat-retaining cookware are all essential components of a successful cold-weather camping kit. By investing in quality gear and following best practices for winter cooking, you’ll be able to enjoy hot meals and beverages even in the coldest conditions.
As we move forward, we’ll explore another critical aspect of winter camping: safety gear. Proper safety equipment is crucial for navigating the unique challenges that come with camping in cold and potentially hazardous environments.

Winter-Specific Safety Gear
When venturing into the winter wilderness, safety should be your top priority. The harsh and unpredictable conditions of winter camping demand specialized gear to ensure your well-being. In this section, we’ll explore the essential winter-specific safety gear that every camper should have in their arsenal.
A. Avalanche Safety Tools
In mountainous terrain, avalanches pose a significant risk during winter camping trips. Being prepared with the right avalanche safety tools can mean the difference between life and death. Here are the must-have items for avalanche safety:
-
Avalanche Beacon (Transceiver): This electronic device is crucial for locating buried victims in the event of an avalanche. Always wear it on your body, not in your backpack.
-
Avalanche Probe: Used to pinpoint the exact location of a buried victim once the general area has been identified with the beacon.
-
Avalanche Shovel: Essential for quickly digging out buried victims or creating emergency shelters.
-
Avalanche Airbag Backpack: While not mandatory, this can significantly increase your chances of survival by helping you stay on top of the snow during an avalanche.
Avalanche Safety Gear Comparison
| Item | Purpose | Approximate Weight | Essential? |
|---|---|---|---|
| Avalanche Beacon | Locating buried victims | 200-300g | Yes |
| Avalanche Probe | Pinpointing victim’s location | 200-400g | Yes |
| Avalanche Shovel | Digging out victims or creating shelters | 400-800g | Yes |
| Avalanche Airbag Backpack | Increasing survival chances | 2-3kg | Recommended |
Remember, having these tools is not enough. Proper training in their use and understanding avalanche risks are equally important for winter camping safety.
B. Emergency Shelter
In extreme winter conditions, having an emergency shelter can be a lifesaver. Your primary shelter (tent or otherwise) might fail, or you might find yourself in a situation where setting up your main camp is impossible. Here are some emergency shelter options to consider:
-
Bivy Sack: A lightweight, waterproof sack that fits over your sleeping bag, providing additional protection from the elements.
-
Emergency Blanket (Space Blanket): Ultra-lightweight and compact, these metallic blankets reflect your body heat, helping to prevent hypothermia in emergency situations.
-
Tarp: A versatile piece of gear that can be configured in various ways to create a quick shelter.
-
Snow Shovel: While primarily an avalanche safety tool, a snow shovel can also be used to create snow shelters like quinzhees or snow caves.
When choosing an emergency shelter, consider factors such as weight, ease of use, and effectiveness in extreme cold. Practice setting up your emergency shelter before your trip to ensure you can do it quickly and efficiently when needed.
C. First Aid Kit with Cold-Specific Items
A well-stocked first aid kit is essential for any camping trip, but winter camping requires some additional, cold-specific items. Here’s what your winter camping first aid kit should include:
-
Standard First Aid Items:
- Bandages, gauze, and medical tape
- Antiseptic wipes and antibiotic ointment
- Pain relievers and anti-inflammatory medication
- Tweezers and scissors
- Emergency blanket (also useful for shelter)
-
Cold-Specific Additions:
- Chemical hand and foot warmers
- Blister treatment and moleskin (cold increases blister risk)
- Hypothermia thermometer (to accurately assess core body temperature)
- Electrolyte packets (to replace salts lost through sweating)
- Lip balm and moisturizer (to combat dry, cracked skin)
- Sunscreen and snow goggles (to protect against snow blindness)
-
Medications:
- Any personal prescription medications
- Antihistamines (for allergic reactions)
- Anti-diarrheal medication (dehydration is especially dangerous in cold weather)
-
Emergency Tools:
- Multi-tool or knife
- Firestarter and waterproof matches
- Emergency whistle
- Small flashlight or headlamp with extra batteries
Winter First Aid Kit Checklist
- Standard first aid supplies
- Chemical warmers
- Blister treatment
- Hypothermia thermometer
- Electrolyte packets
- Lip balm and moisturizer
- Sunscreen and snow goggles
- Personal medications
- Emergency tools
It’s crucial to familiarize yourself with the contents of your first aid kit and know how to use each item properly. Consider taking a wilderness first aid course to enhance your preparedness for winter camping emergencies.
When packing your winter-specific safety gear, remember that weight and space are always considerations in backpacking. However, these items are critical for your safety and should not be compromised. Prioritize these essentials over less crucial comfort items if necessary.
Regular inspection and maintenance of your safety gear are vital. Check your avalanche beacon batteries, ensure your emergency shelter is in good condition, and restock your first aid kit before each trip. It’s also wise to inform someone of your trip plans and expected return date before heading out.
With the right winter-specific safety gear and the knowledge to use it, you’ll be well-prepared to handle emergencies and enjoy a safe winter camping experience. Remember, preparation is key in the wilderness, especially during the challenging winter months.
Now that we’ve covered the essential safety gear for winter camping, let’s move on to the importance of proper navigation and communication devices in the next section. These tools will not only enhance your safety but also enrich your overall winter camping experience.

Navigation and Communication Devices
When venturing into the winter wilderness, having reliable navigation and communication devices is crucial for your safety and peace of mind. These tools can help you find your way through snow-covered landscapes and call for help in case of emergencies. Let’s explore the essential navigation and communication devices you should include in your winter camping kit.
A. GPS Device with Extra Batteries
A GPS (Global Positioning System) device is an indispensable tool for winter camping. It provides accurate location information, helps you navigate through unfamiliar terrain, and can guide you back to your campsite or starting point.
Features to Look for in a Winter-Ready GPS Device:
- Waterproof and shockproof construction
- Large, glove-friendly buttons
- High-sensitivity receiver for use under dense tree cover
- Long battery life
- Ability to store waypoints and routes
- Preloaded topographic maps
When choosing a GPS device for winter camping, opt for models specifically designed for rugged outdoor use. These devices are built to withstand extreme temperatures and harsh conditions.
Battery Considerations:
- Always carry extra batteries for your GPS device
- Lithium batteries perform better in cold temperatures compared to alkaline batteries
- Keep spare batteries in an inside pocket close to your body to maintain their charge
| Battery Type | Performance in Cold | Lifespan | Cost |
|---|---|---|---|
| Lithium | Excellent | Long | High |
| Alkaline | Poor | Moderate | Low |
| NiMH | Good | Moderate | Moderate |
B. Topographic Maps and Compass
While a GPS device is an excellent navigation tool, it’s crucial to have a backup system in case of electronic failure or battery depletion. This is where traditional navigation tools come into play.
Topographic Maps:
Topographic maps provide detailed information about the terrain, including:
- Elevation contours
- Water sources
- Trails and campsites
- Natural landmarks
When selecting topographic maps for your winter camping trip:
- Choose maps with the appropriate scale (1:24,000 or 1:50,000 are ideal for hiking)
- Ensure the maps cover your entire planned route and surrounding areas
- Look for waterproof maps or use a waterproof map case
- Familiarize yourself with map reading and interpretation before your trip
Compass:
A reliable compass is an essential companion to your topographic maps. When choosing a compass for winter camping:
- Select a liquid-filled compass for stability in cold temperatures
- Look for a model with a baseplate for easy map reading
- Choose a compass with adjustable declination to account for the difference between true north and magnetic north
- Consider a model with luminous markings for nighttime navigation
Remember to practice using your map and compass together before your winter camping trip. Knowing how to triangulate your position and plot a course can be invaluable in emergency situations.
C. Satellite Communication Device
In remote winter camping locations, cell phone coverage can be unreliable or non-existent. A satellite communication device ensures you can stay connected and call for help if needed.
Types of Satellite Communication Devices:
- Satellite Phones: These devices allow voice calls and text messaging via satellite networks.
- Personal Locator Beacons (PLBs): Designed for emergencies, PLBs send out distress signals with your location to search and rescue services.
- Satellite Messengers: These devices offer two-way text messaging, GPS tracking, and SOS functionality.
Features to Consider:
- Battery life in cold temperatures
- Ease of use with gloves
- Durability and weather resistance
- Coverage area of the satellite network
- Subscription costs and plans
| Device Type | Communication | Battery Life | SOS Function | Cost |
|---|---|---|---|---|
| Satellite Phone | Voice + Text | Moderate | Yes (some models) | High |
| PLB | Emergency Only | Long | Yes | Moderate |
| Satellite Messenger | Text + Tracking | Long | Yes | Moderate |
When choosing a satellite communication device, consider the nature of your winter camping trips, the regions you’ll be exploring, and your budget. For most winter campers, a satellite messenger offers a good balance of features and affordability.
Now that we’ve covered the essential navigation and communication devices for your winter camping trip, it’s important to remember that these tools are only as good as your ability to use them. Before heading out, take the time to familiarize yourself with each device, practice using them in various conditions, and ensure all batteries are fully charged.
With these navigation and communication devices in your winter camping kit, you’ll be well-prepared to explore the snowy wilderness safely and confidently. Next, we’ll explore the importance of proper illumination for those long winter nights, ensuring you can safely navigate your campsite and surroundings even when daylight is scarce.
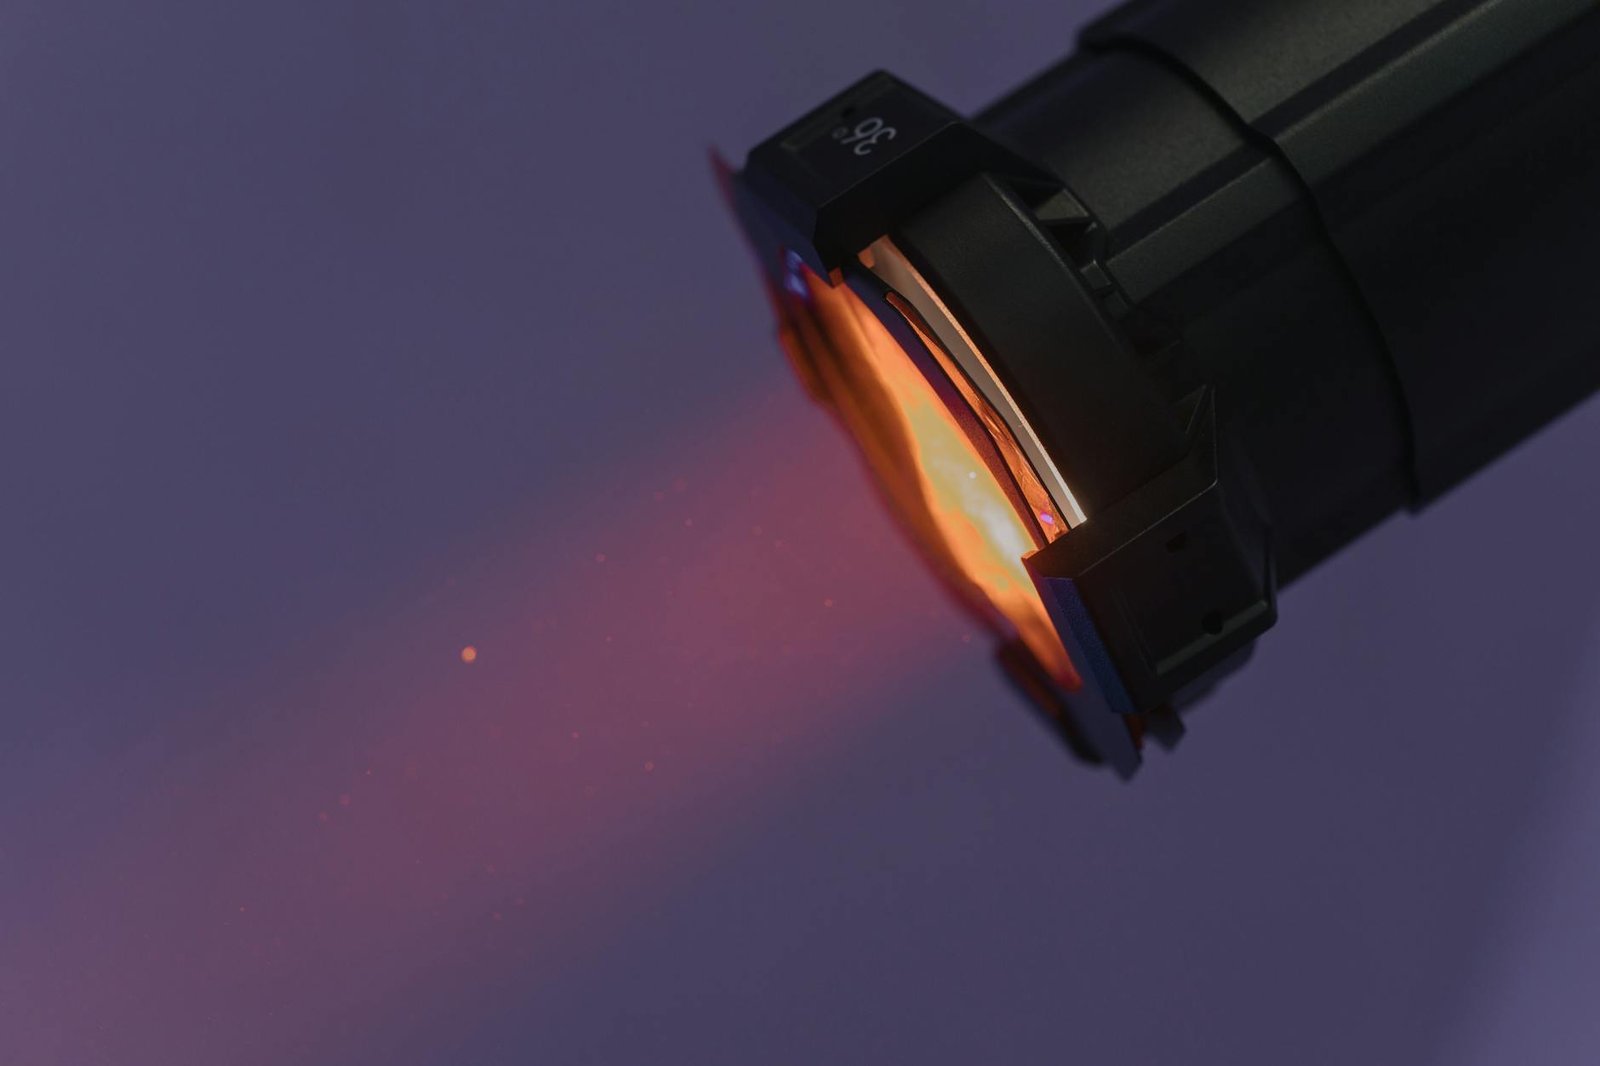
Illumination for Long Winter Nights
As we delve into the essentials for your winter camping adventure, let’s shed some light on a crucial aspect of your outdoor experience: illumination. With shorter days and longer nights during the winter season, having reliable lighting sources becomes paramount for both safety and comfort. In this section, we’ll explore the must-have illumination tools that will keep your campsite well-lit and your activities running smoothly, even in the darkest winter nights.
A. Headlamp with Extra Batteries
A headlamp is an indispensable item for any winter camping trip. This hands-free lighting solution allows you to navigate your campsite, prepare meals, or engage in activities while keeping your hands free for other tasks. When choosing a headlamp for winter camping, consider the following features:
- Brightness: Look for a headlamp with adjustable brightness levels, typically ranging from 100 to 300 lumens for general use, with a boost mode of up to 1000 lumens for emergencies.
- Battery life: Opt for models with long-lasting battery life, ideally 30+ hours on medium settings.
- Cold-weather performance: Choose headlamps designed to withstand low temperatures, as regular batteries can lose efficiency in cold conditions.
- Red light mode: This feature helps preserve night vision and is less disruptive to wildlife and fellow campers.
- Water resistance: Ensure your headlamp can withstand snow and moisture.
Always pack extra batteries for your headlamp. Lithium batteries are recommended for winter camping as they perform better in cold temperatures compared to alkaline batteries.
Here’s a comparison of some popular headlamp options for winter camping:
| Model | Lumens | Battery Life | Cold-Weather Rating | Red Light Mode | Water Resistance |
|---|---|---|---|---|---|
| Black Diamond Spot 350 | 350 | Up to 200 hours | -20°C/-4°F | Yes | IPX8 |
| Petzl Actik Core | 450 | Up to 130 hours | -30°C/-22°F | Yes | IPX4 |
| Fenix HM65R | 1400 | Up to 300 hours | -40°C/-40°F | No | IP68 |
B. Lantern for Camp Lighting
While a headlamp is essential for personal lighting, a lantern provides broader illumination for your entire campsite. A good camping lantern can create a cozy atmosphere and facilitate group activities after dark. When selecting a lantern for winter camping, consider these factors:
- Brightness: Look for lanterns with adjustable brightness, typically ranging from 100 to 500 lumens.
- Fuel type: LED battery-powered lanterns are most common and convenient for winter camping.
- Size and weight: Choose a compact and lightweight option that’s easy to pack and carry.
- Durability: Opt for rugged designs that can withstand accidental drops and cold temperatures.
- Hanging options: Look for lanterns with hooks or handles for easy placement around your campsite.
Some lanterns also come with additional features like USB charging ports for your devices or color-changing modes for ambiance. Here are some lantern options suitable for winter camping:
- LED collapsible lanterns: These space-saving options are lightweight and easy to pack.
- Solar-powered lanterns: While less reliable in winter due to reduced daylight, they can be a good backup option if equipped with a USB charging feature.
- Candle lanterns: These provide a warm, natural light and can also generate a small amount of heat, but require extra caution to use safely.
C. Backup Flashlight
While a headlamp and lantern should cover most of your lighting needs, it’s always wise to have a backup flashlight in your winter camping kit. A reliable handheld flashlight serves as an excellent emergency light source and can be useful in situations where you need a focused beam of light. When choosing a backup flashlight for winter camping, consider:
- Durability: Look for impact-resistant and weather-sealed models.
- Battery type: Choose flashlights that use the same battery type as your headlamp for convenience.
- Size: Opt for a compact design that’s easy to carry in your pocket or pack.
- Beam distance: Select a flashlight with a strong beam that can illuminate objects at a distance of at least 100 meters.
- Multiple modes: Features like strobe or SOS modes can be crucial in emergency situations.
Here’s a list of features to look for in a backup flashlight:
- Rechargeable battery option
- Adjustable focus (spot to flood beam)
- Clip or lanyard for easy carrying
- Tailstand capability for use as a makeshift lantern
- Glow-in-the-dark accents for easy location in the dark
Remember to store your backup flashlight in an easily accessible location within your gear, and always check its functionality before your trip.
Proper illumination is not just about convenience; it’s a critical safety factor in winter camping. With the right combination of a headlamp, lantern, and backup flashlight, you’ll be well-equipped to handle the long winter nights and any unexpected situations that may arise during your outdoor adventure.
As we move forward, we’ll explore another essential aspect of winter camping: the snow tools necessary for setting up your camp in snowy conditions. These tools will help you create a comfortable and secure campsite, even in the most challenging winter environments.
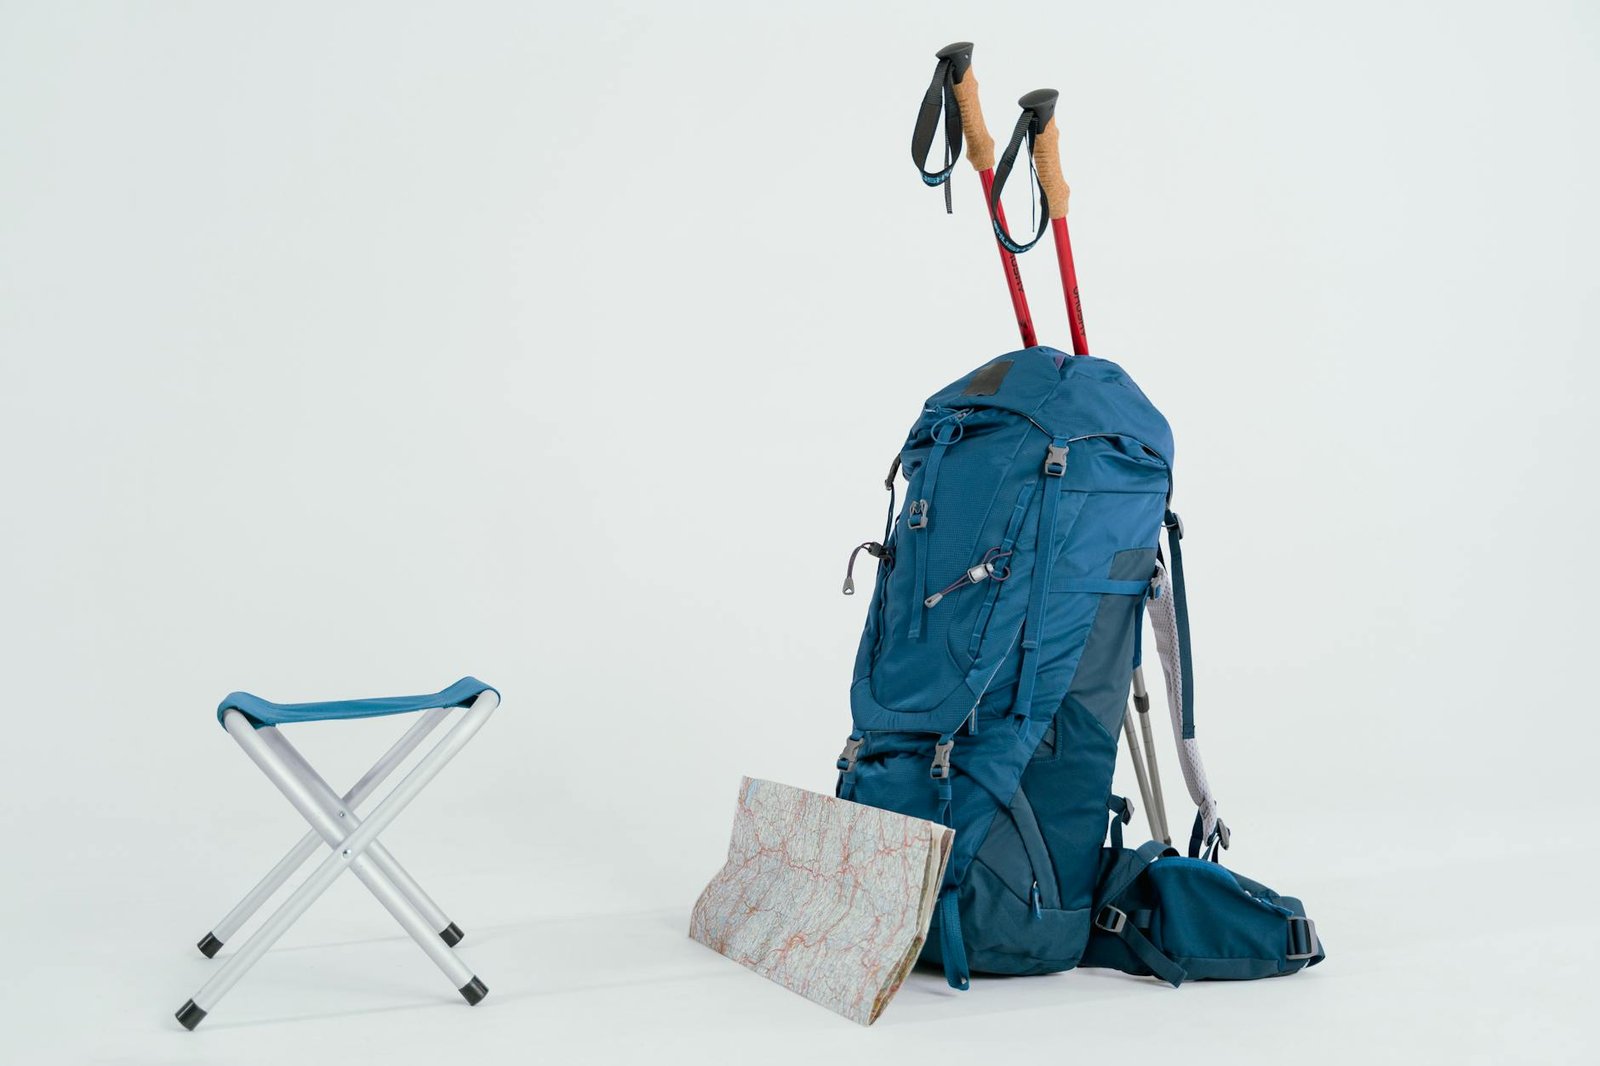
Snow Tools for Camp Setup
As we delve into the essential snow tools for your winter camping trip, it’s important to recognize how these items can make or break your outdoor experience. Proper camp setup in snowy conditions requires specialized equipment to ensure safety, comfort, and efficiency. Let’s explore the three crucial snow tools that should be on every winter camper’s checklist.
A. Snow shovel for clearing and building
A snow shovel is perhaps the most versatile and indispensable tool for winter camping. Its uses extend far beyond simply clearing snow from your campsite. Here’s why a snow shovel is a must-have item:
- Campsite preparation: Clear snow to create a level surface for your tent and living area.
- Snow shelter construction: Build snow walls or even igloos for extra protection from wind and cold.
- Fire pit creation: Dig out a safe area for your campfire, ensuring it’s away from overhanging branches and other hazards.
- Water collection: Gather clean snow for melting into drinking water.
- Emergency signaling: Use the reflective surface of a metal shovel to signal for help if needed.
When choosing a snow shovel for winter camping, consider the following factors:
| Feature | Importance | Explanation |
|---|---|---|
| Weight | High | Opt for lightweight materials like aluminum or reinforced plastic to reduce pack weight |
| Collapsibility | High | Choose a shovel that can be disassembled or folded for easy packing |
| Blade size | Medium | Balance between efficiency and portability; a blade around 9-11 inches wide is typically sufficient |
| Handle length | Medium | Extendable handles provide versatility for different tasks |
| Durability | High | Look for robust construction to withstand freezing temperatures and heavy use |
Remember, a snow shovel is not just a convenience but a vital piece of snow camping equipment that can significantly enhance your safety and comfort in winter conditions.
B. Snow stakes for secure tent pitching
Regular tent stakes often prove ineffective in snow, as they can easily pull out under tension. This is where snow stakes come into play, providing a secure anchor for your tent in soft, powdery conditions. Here’s why snow stakes are crucial:
- Enhanced stability: Snow stakes offer superior hold in loose snow compared to regular stakes.
- Wind resistance: Properly placed snow stakes help your tent withstand strong winter gusts.
- Versatility: They can be used to anchor guy lines for tarps, snow walls, or other structures.
- Durability: Designed to withstand freezing temperatures and repeated use in harsh conditions.
When selecting and using snow stakes, keep these tips in mind:
- Choose stakes made from lightweight, strong materials like aluminum or titanium.
- Look for stakes with a broad surface area to increase holding power in snow.
- Consider stakes with holes along the length for creating deadman anchors in deep snow.
- Pack more stakes than you think you’ll need, as snow conditions can vary greatly.
To properly use snow stakes:
- Dig a small trench perpendicular to the direction of pull.
- Place the stake horizontally in the trench.
- Cover with snow and pack it down firmly.
- Attach your guy line to the exposed end of the stake.
This “deadman” anchor technique provides maximum hold in soft snow conditions, ensuring your tent remains secure throughout your winter camping adventure.
C. Ice axe for steep terrain
While not necessary for all winter camping trips, an ice axe becomes an essential tool when venturing into mountainous or steep terrain. Its primary functions include:
- Self-arrest: Stopping a fall on steep, snowy slopes.
- Step cutting: Creating footholds in hard snow or ice for safer ascents and descents.
- Anchoring: Providing a secure point for belaying or setting up emergency shelters.
- Probing: Testing snow depth and consistency to assess avalanche risk.
Choosing the right ice axe requires consideration of several factors:
| Factor | Consideration |
|---|---|
| Length | Should reach your ankle when standing upright with the axe in hand |
| Weight | Lighter axes are easier to carry but may sacrifice durability |
| Head material | Steel offers durability, while aluminum is lighter but less durable |
| Shaft material | Aluminum is common for general mountaineering; carbon fiber for ultralight options |
| Spike | A sharp spike aids in balance and self-arrest on icy terrain |
Proper training in ice axe use is crucial before relying on it in the backcountry. Many outdoor organizations offer courses in winter mountaineering skills, including ice axe techniques.
When using an ice axe:
- Always carry it with the spike pointing away from you and the pick facing backward.
- Practice self-arrest techniques in a safe environment before your trip.
- Use the axe for balance when traversing steep slopes.
- Be cautious when using the axe for step cutting, as it can be physically demanding and time-consuming.
While these snow tools are essential for winter camping, it’s important to note that they require practice and proper technique to be used effectively. Before your trip, familiarize yourself with each tool and consider taking a winter camping course to hone your skills.
With the right snow tools and knowledge of how to use them, you’ll be well-prepared to set up a safe and comfortable camp in winter conditions. These tools not only enhance your camping experience but also contribute significantly to your safety in challenging winter environments.
As we’ve covered the essential snow tools for camp setup, it’s time to turn our attention to another crucial aspect of winter camping: staying hydrated and nourished in cold conditions. Let’s explore the hydration and nutrition essentials that will keep you energized throughout your winter adventure.

Hydration and Nutrition Essentials
Now that we’ve covered the necessary tools for setting up your winter campsite, let’s dive into one of the most crucial aspects of any camping trip: hydration and nutrition. In winter camping, these elements become even more critical due to the increased energy demands of cold weather and the unique challenges of staying hydrated in freezing temperatures.
High-calorie, nutrient-dense foods
When camping in winter, your body burns more calories to maintain its core temperature. This increased energy expenditure means you’ll need to consume more calories than you would during a summer camping trip. Opt for foods that are not only high in calories but also rich in nutrients to keep your body functioning optimally in harsh conditions.
Here are some excellent options for high-calorie, nutrient-dense foods to pack for your winter camping trip:
- Nuts and seeds: Almonds, walnuts, pumpkin seeds, and sunflower seeds are excellent sources of healthy fats, protein, and essential minerals.
- Dried fruits: Raisins, apricots, and cranberries provide quick energy and essential vitamins.
- Energy bars: Look for bars with a good balance of carbohydrates, protein, and healthy fats.
- Jerky: A great source of protein that’s lightweight and easy to pack.
- Peanut butter or other nut butters: High in calories and protein, these spreads are versatile and can be added to many dishes.
- Instant oatmeal: A warm, comforting breakfast that’s easy to prepare and provides sustained energy.
- Dehydrated meals: These lightweight, easy-to-prepare meals are designed to meet the nutritional needs of outdoor enthusiasts.
When planning your meals, aim for a balance of macronutrients:
| Macronutrient | Percentage of Daily Intake | Benefits for Winter Camping |
|---|---|---|
| Carbohydrates | 50-60% | Quick energy, helps maintain body heat |
| Protein | 15-20% | Muscle repair, sustained energy |
| Fats | 25-35% | Long-lasting energy, insulation |
Remember to pack enough food for emergencies. A good rule of thumb is to bring an extra day’s worth of food in case of unexpected delays or weather changes.
Water purification system for melting snow
Staying hydrated is just as important in winter as it is in summer, if not more so. The dry, cold air can quickly lead to dehydration, which can be dangerous in a winter environment. However, finding liquid water sources can be challenging when everything is frozen. This is where a reliable water purification system for melting snow becomes essential.
When choosing a water purification system for winter camping, consider the following options:
- Compact stove systems: These integrated stove and pot systems are designed to melt snow efficiently and boil water quickly.
- Water filters with backflush capabilities: These can handle the sediment often found in melted snow.
- UV purifiers: These are effective but require batteries, which may not perform well in cold temperatures.
- Chemical treatments: Tablets or drops can be used but may take longer to work in cold water.
Whichever system you choose, make sure it’s designed to work in freezing temperatures. Some filters can crack if they freeze, rendering them useless.
Tips for melting snow for drinking water:
- Always use clean, white snow. Avoid discolored or dirty snow.
- Start with a small amount of water in your pot before adding snow. This prevents scorching and improves melting efficiency.
- Bring the melted snow to a rolling boil for at least one minute to ensure it’s safe to drink.
- Plan ahead: Melting snow for water is time-consuming and fuel-intensive. Factor this into your daily routine.
Thermos for hot drinks
A high-quality thermos is an invaluable item for winter camping. It allows you to keep drinks hot for hours, providing warmth and comfort in the cold environment. When choosing a thermos for winter camping, look for the following features:
- Double-wall vacuum insulation for maximum heat retention
- Durable construction to withstand freezing temperatures
- Wide mouth for easy filling and cleaning
- Leak-proof design to prevent spills in your backpack
Some recommended uses for your thermos during a winter camping trip include:
- Hot coffee or tea to start your day
- Warm soup for a mid-day energy boost
- Hot chocolate for a comforting treat before bed
- Pre-heated water for faster meal preparation
Pro tip: Pre-heat your thermos by filling it with boiling water and letting it sit for a few minutes before emptying and adding your hot beverage. This will help maintain the temperature of your drink for even longer.
In addition to providing warmth and comfort, hot drinks can also help prevent dehydration. Many people tend to drink less water in cold weather because they don’t feel as thirsty, but staying hydrated is crucial for maintaining energy levels and preventing hypothermia.
By focusing on these hydration and nutrition essentials – high-calorie, nutrient-dense foods, a reliable water purification system, and a quality thermos for hot drinks – you’ll be well-prepared to tackle the challenges of winter camping. These items will help keep your energy levels up, your body hydrated, and your spirits high as you enjoy the beautiful winter wilderness.
Next, we’ll explore the personal care items that are essential for dealing with the harsh conditions of winter camping, ensuring you stay comfortable and protected throughout your adventure.

Personal Care Items for Harsh Conditions
As we venture into the realm of winter camping, it’s crucial to address the often-overlooked aspect of personal care. The harsh winter conditions can take a severe toll on your body, especially your skin. In this section, we’ll explore the essential personal care items that will help you stay comfortable and protected during your cold-weather adventure.
Heavy-duty Lip Balm and Sunscreen
When it comes to winter camping, your lips and skin need extra protection. The combination of cold temperatures, wind, and reflective snow can quickly lead to chapped lips and sunburned skin.
Lip Balm
A heavy-duty lip balm is essential for preventing and treating chapped lips. Look for the following features when choosing a lip balm for your winter camping trip:
- SPF protection (at least SPF 15)
- Moisturizing ingredients like beeswax, shea butter, or coconut oil
- Wind-resistant formula
- Long-lasting effect
| Brand | SPF | Key Ingredients | Wind-Resistant | Duration |
|---|---|---|---|---|
| ChapStick Moisturizer | 12 | Aloe, Vitamin E | Yes | 4-6 hours |
| Burt’s Bees All-Weather | 15 | Zinc Oxide, Beeswax | Yes | 6-8 hours |
| Aquaphor Lip Protectant | 30 | Petrolatum, Vitamins C & E | Yes | 8+ hours |
Apply lip balm frequently throughout the day, especially before heading out into the cold and wind.
Sunscreen
Many winter campers underestimate the need for sunscreen, but the reflective properties of snow can intensify UV rays, increasing the risk of sunburn. Choose a broad-spectrum sunscreen with the following characteristics:
- High SPF (30 or higher)
- Water-resistant formula
- Non-greasy texture
- Contains moisturizing ingredients
Apply sunscreen to all exposed skin, including your face, neck, ears, and hands. Reapply every two hours or more frequently if you’re sweating or participating in activities like skiing or snowboarding.
Hand and Foot Warmers
Cold extremities can quickly turn a fun winter camping trip into a miserable experience. Hand and foot warmers are small, portable heat sources that can provide hours of warmth and comfort.
Types of Hand and Foot Warmers
-
Air-activated warmers:
- Contain iron powder that oxidizes when exposed to air
- Typically last 6-8 hours
- Single-use only
-
Battery-powered warmers:
- Rechargeable and reusable
- Adjustable heat settings
- Can last up to 6 hours on a single charge
-
Fuel-based warmers:
- Use lighter fluid or other combustible materials
- Provide intense heat for extended periods
- Require careful handling and ventilation
Best Practices for Using Hand and Foot Warmers
- Activate hand warmers before you need them, as they take time to reach full heat
- Place foot warmers in your boots, between two pairs of socks for optimal warmth
- Use hand warmers inside mittens or gloves for maximum efficiency
- Carry extra pairs in case of extended cold exposure or emergencies
Moisturizing Lotion for Dry Skin
The combination of cold temperatures and low humidity can wreak havoc on your skin during a winter camping trip. A good moisturizing lotion is essential for preventing and treating dry, cracked skin.
Choosing the Right Moisturizer
Look for a moisturizer with the following properties:
- Thick, emollient-rich formula
- Non-greasy texture
- Quick absorption
- Fragrance-free (to avoid attracting insects or wildlife)
- Contains ingredients like:
- Glycerin
- Hyaluronic acid
- Ceramides
- Shea butter
- Vitamin E
Application Tips
- Apply moisturizer immediately after bathing or washing hands to lock in moisture
- Focus on areas prone to dryness, such as hands, feet, elbows, and knees
- Reapply throughout the day, especially after exposure to water or harsh conditions
- Consider using a separate facial moisturizer for more delicate skin
Additional Personal Care Considerations
While lip balm, sunscreen, hand and foot warmers, and moisturizing lotion are essential, there are a few other personal care items to consider for your winter camping trip:
- Biodegradable wet wipes: For quick clean-ups when water is scarce or frozen
- Insulated water bottle: To prevent your drinking water from freezing
- Nail clippers and file: Cold, dry conditions can lead to brittle nails
- Eye drops: To combat dry eyes caused by wind and cold
- Petroleum jelly: Multi-purpose product for chafing, windburn, and dry skin
| Item | Purpose | Recommended Quantity |
|---|---|---|
| Biodegradable wet wipes | Quick clean-ups | 1 pack (30-50 wipes) |
| Insulated water bottle | Prevent water freezing | 1-2 bottles (32 oz each) |
| Nail clippers and file | Nail care | 1 set |
| Eye drops | Relieve dry eyes | 1 small bottle |
| Petroleum jelly | Multi-purpose skin protection | 1 small jar |
By prioritizing these personal care items, you’ll be better equipped to handle the harsh conditions of winter camping. Proper skin care and protection not only enhance your comfort but also contribute to your overall safety and enjoyment of the outdoor experience.
Now that we’ve covered the essential personal care items for your winter camping trip, let’s explore some entertainment and comfort items that can make your cold-weather adventure even more enjoyable.

Entertainment and Comfort Items
Now that we’ve covered the essential gear for survival and safety during your winter camping trip, let’s explore some items that will enhance your comfort and enjoyment in the great outdoors. While these may not be critical for survival, they can significantly improve your camping experience and create lasting memories.
A. Lightweight, Insulated Camp Chair
After a long day of hiking or setting up camp in the snow, having a comfortable place to sit can make all the difference. A lightweight, insulated camp chair is an excellent addition to your winter camping gear.
Benefits of a Quality Camp Chair:
- Provides insulation from the cold ground
- Offers a comfortable seating option for relaxation
- Reduces fatigue and muscle strain
- Enhances overall camping experience
When selecting a camp chair for winter camping, consider the following features:
| Feature | Importance | Explanation |
|---|---|---|
| Insulation | High | Prevents heat loss to the cold ground |
| Weight | Medium | Should be lightweight for easy transport |
| Durability | High | Must withstand harsh winter conditions |
| Compact design | Medium | Easy to pack and carry in your backpack |
| Weight capacity | High | Should support your weight plus winter clothing |
Some popular options for winter camping chairs include the Helinox Chair Zero and the REI Co-op Flexlite Air Chair. These chairs offer a good balance of comfort, insulation, and portability, making them ideal for winter camping trips.
B. Compact Card Games or Books
Long winter nights provide ample opportunity for entertainment around the campfire or inside your tent. Bringing along compact card games or books can offer hours of enjoyment and help pass the time when daylight is limited.
Card Games for Winter Camping:
- Traditional playing cards (versatile and compact)
- UNO (fun for groups and easy to learn)
- Sushi Go! (quick, engaging card game for 2-5 players)
- Love Letter (simple yet strategic game for 2-4 players)
When choosing books for winter camping, opt for lightweight paperbacks or e-readers to minimize added weight in your pack. Consider bringing a mix of fiction and non-fiction titles, including:
- Adventure novels to match your outdoor spirit
- Field guides for identifying local flora and fauna
- Star charts for stargazing on clear winter nights
- Short story collections for quick reads
Remember to pack your entertainment items in waterproof bags or containers to protect them from moisture and snow.
C. Camera for Capturing Winter Landscapes
Winter landscapes offer breathtaking photo opportunities, from snow-capped mountains to frost-covered trees. Bringing a camera on your winter camping trip allows you to capture these stunning scenes and create lasting memories of your adventure.
Tips for Winter Photography:
-
Choose the right camera: Opt for a weather-sealed camera that can withstand cold temperatures and potential moisture.
-
Bring extra batteries: Cold weather can drain batteries quickly, so pack spares and keep them warm in an inside pocket.
-
Use a tripod: Stabilize your camera for crisp shots, especially in low light conditions.
-
Protect your gear: Use a padded, waterproof camera bag to shield your equipment from the elements.
-
Adjust your settings: Experiment with exposure compensation to capture the bright, reflective qualities of snow accurately.
-
Be mindful of condensation: When moving between cold and warm environments, allow your camera to acclimate slowly to prevent fogging.
| Camera Type | Pros | Cons |
|---|---|---|
| DSLR | High image quality, versatile lens options | Bulky, heavier to carry |
| Mirrorless | Compact, lightweight, good image quality | May have shorter battery life |
| Point-and-shoot | Very compact, easy to use | Limited manual controls |
| Smartphone | Always with you, lightweight | Limited in low light, cold can affect performance |
Regardless of the camera you choose, remember to practice using it before your trip and familiarize yourself with its settings in cold weather conditions.
Enhancing Your Winter Camping Experience
While entertainment and comfort items may seem like luxury additions to your winter camping gear, they can significantly enhance your overall experience. A comfortable chair provides a cozy spot to relax and enjoy the winter scenery, while card games and books offer entertainment during long nights or inclement weather. A camera allows you to capture the beauty of your surroundings and create lasting memories of your winter camping adventure.
When packing these items, consider their weight and bulk carefully. Opt for lightweight, compact options that won’t overburden your pack. Remember that the primary focus should always be on essential gear for safety and survival in winter conditions.
By thoughtfully including entertainment and comfort items in your winter camping kit, you can create a more enjoyable and memorable experience in the great outdoors. These items can help you relax, stay entertained, and fully appreciate the unique beauty of winter landscapes. As we move forward, we’ll explore how to balance these comfort items with the essential gear needed for a safe and successful winter camping trip.
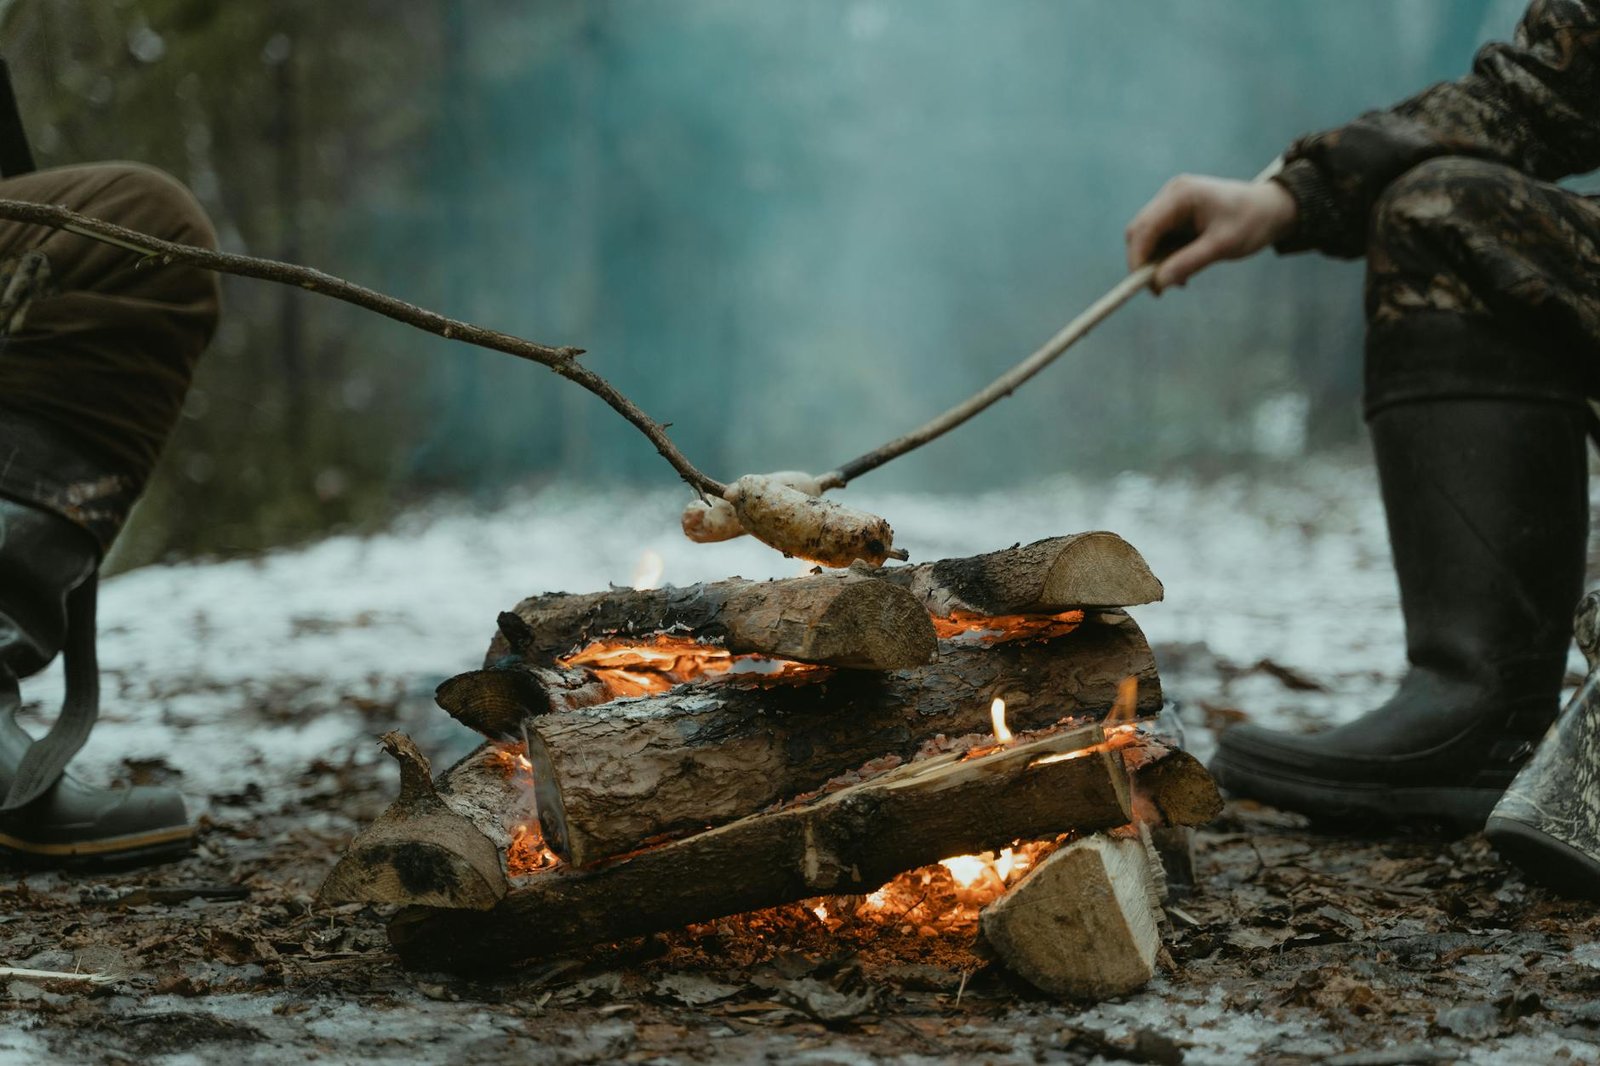
Winter camping can be an exhilarating adventure when you’re properly prepared. By packing the ten essential items discussed in this post, you’ll be ready to face the challenges of cold-weather outdoor experiences. From warm, layered clothing to a reliable sleep system, and from crucial safety gear to entertainment options, each item plays a vital role in ensuring your comfort and security in the wilderness.
Remember, thorough preparation is key to a successful winter camping trip. Take the time to gather and familiarize yourself with all the necessary equipment before heading out. With the right gear and a positive attitude, you’ll be well-equipped to create unforgettable memories in the serene beauty of a winter landscape. So pack your bags, embrace the cold, and embark on your next frosty outdoor adventure!

